
Student Manual
Application Layout
Filter Tabs
You can organize multiple courses in your library with the help of filter tabs. It comprises of pre-defined filter tabs:

Figure 3.1: Archive Option

Figure 3.2: My Library Page with Pre-Defined Tabs
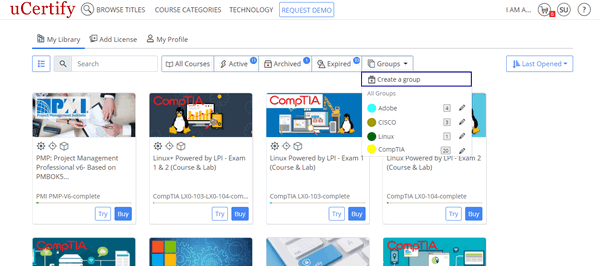
Figure 3.3: Groups button with the Create a group option
Type the name for the group of courses, which you want to create. Pick a color to identify your group and select the required courses for your group. Finally, click the Add button to create the group.

Figure 3.4: Create a group modal box
You can view the group name, color assigned to the group, and number of courses in the group, under the Groups drop-down.
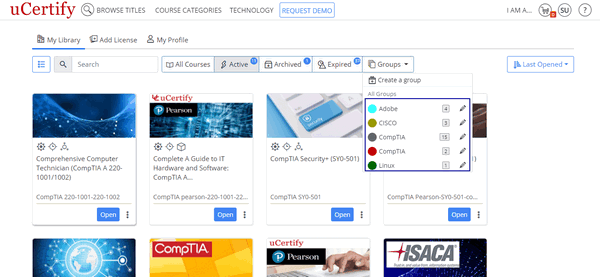
Figure 3.5: My Library Page with Course Group
To edit the details of the group or to delete the desired group, click the Groups drop-down and click the pencil icon next to the group name.
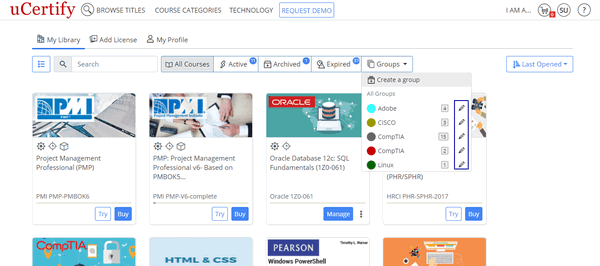
Figure 3.6: My Library Page with Edit Course Group Option

Figure 3.7: Edit Group Modal Box with Delete Course Option
- Active - All the active courses will be shown here.
- Archived - If you have archived any course, then it will be shown here.

Figure 3.1: Archive Option
- Expired - All the expired courses will be shown here.
- Ungrouped - All the courses, which does not belong to any group will be shown here.

Figure 3.2: My Library Page with Pre-Defined Tabs

Figure 3.3: Groups button with the Create a group option
Type the name for the group of courses, which you want to create. Pick a color to identify your group and select the required courses for your group. Finally, click the Add button to create the group.

You can view the group name, color assigned to the group, and number of courses in the group, under the Groups drop-down.

Figure 3.5: My Library Page with Course Group
To edit the details of the group or to delete the desired group, click the Groups drop-down and click the pencil icon next to the group name.

Figure 3.6: My Library Page with Edit Course Group Option

Figure 3.7: Edit Group Modal Box with Delete Course Option